
Capture Drawings
The various Drawings are added via the Navigation menu. It is possible that you do not immediately see the Drawings in the Navigation menu (this depends on the settings in your system), you can make them visible via the button at the bottom left ![]() .
.
To create Drawings, make sure you are in Develop Mode via the switch ![]() in the Application bar (right behind your Username).
in the Application bar (right behind your Username).
Create new Drawings:
Step 1:
Select Drawings in the Navigation menu, right-click and select “Add Drawings” or click “Add” in the top right corner of the Main screen.
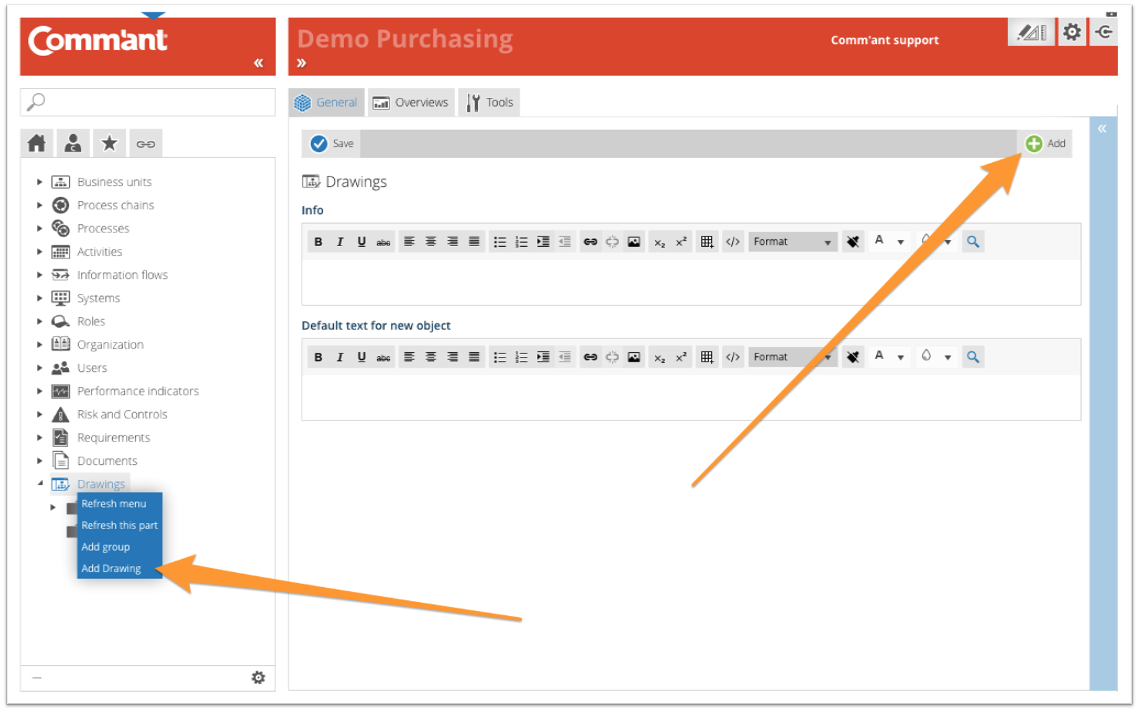
Step 2:
Give the Drawing a Name.
The Drawing tool allows you to create interactive graphics that allow you to create references to other objects within your management system. For example, you can create an organizational chart.
Drawings can be included in the description, content, or comments field of any object in Comm’ant.
You have the option to place any image or photo in the background (created in a drawing program or Photoshop) and add click areas to it.
With click areas, you designate parts of the image that users can click on, and then they will be redirected to a specific object within the management system or another website.
You can also design organizational charts and diagrams without a background image by using the different object types.
Canvas
The size of a Drawing is determined by the Canvas: the grid in the background. You can change the canvas as you see fit (reduce or enlarge it). Objects and elements that fall outside the canvas will not be displayed in the final drawing.
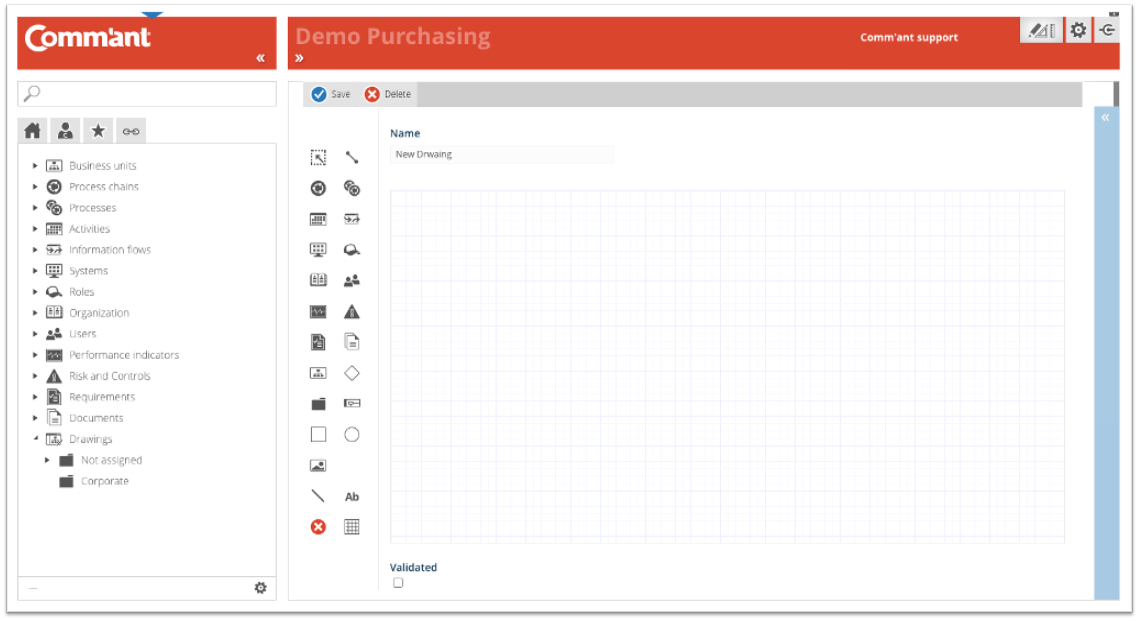
Drawing tools
When you are working in Development mode, you will find several tools on the left side of a Drawing object. These tools allow you to place objects on the Canvas. Once you have placed an object on the Canvas, you can view and set the properties of that object by double-clicking on the placed object. A popup window will appear:

In this example, an object of type Process chain has been placed. Double-click to open the Properties to define:
- Title: this field is used to modify the title in the object or to search for and then realize a reference to an existing object. To search for an object, click on the magnifying glass. You can then select an object of the desired type.
- Font color: allows you to adjust the color of the text.
- Background color: allows you to adjust the background color.
- Border width: allows you to set the thickness of any border around the object.
- Border color: allows you to adjust the color of the border.
- Is click area: allows you to define the object only as a click area. The object itself is not visible to the user but is clickable.
- Font size: allows you to adjust the size of the text.
- Font style: allows you to make the text bold, italic, or underlined.
- Move to front / Move to back: allows you to change the visible order of objects. Useful where they overlap.
- OK: click OK when you are done with the properties.
You can adjust the size of the object by selecting it and dragging one of the vertices.
You can delete an object by selecting it and pressing Delete on your keyboard.
| Selection and Connecting | |
 |
Select: This tool allows you to select a previously placed object and, for example, move it.
Click on the icon and then on an object in the Drawing to select it and, for example, move it, resize it or delete it. You delete an object from the Canvas by selecting it and pressing Delete on your keyboard. |
 |
Dynamic lines: this tool allows you to draw lines between placed objects. If you move the objects, the lines automatically move with them.
Click on this icon. You will see that connecting points become visible next to the objects placed on the canvas. Click on a connecting point of an object of your choice and then on a connecting point of another object to create a dynamic line between the two objects. You can create as many lines between objects as you like. |
| Positioning objects |
|
 |
Main Process: this tool allows you to place an object of type Main Process on the canvas.
Click on this icon and then click on the spot on the canvas where you want to place the object. Double click on the placed object to set its properties. |
 |
Process: this tool allows you to place an object of type Process on the canvas.
Click on this icon and then click on the spot on the canvas where you want to place the object. Double click on the placed object to set its properties. |
 |
Activity: this tool allows you to place an object of type Activity on the canvas.
Click on this icon and then click on the spot on the canvas where you want to place the object. Double click on the placed object to set its properties. |
 |
Information flow: this tool allows you to place an object of type Information flow on the canvas.
Click on this icon and then click on the spot on the canvas where you want to place the object. Double click on the placed object to set its properties. |
 |
System: this tool allows you to place an object of type System on the canvas.
Click on this icon and then click on the spot on the canvas where you want to place the object. Double click on the placed object to set its properties. |
 |
Role: this tool allows you to place an object of type Role on the canvas.
Click on this icon and then click on the spot on the canvas where you want to place the object. Double click on the placed object to set its properties. |
 |
Function: this tool allows you to place an object of type Function on the canvas.
Click on this icon and then click on the spot on the canvas where you want to place the object. Double click on the placed object to set its properties. |
 |
Employee: this tool allows you to place an object of type Employee on the canvas.
Click on this icon and then click on the spot on the canvas where you want to place the object. Double click on the placed object to set its properties |
 |
Performance indicators: this tool allows you to place an object of type Performance indicators on the canvas.
Click on this icon and then click on the spot on the canvas where you want to place the object. Double click on the placed object to set its properties |
 |
Risk: This tool allows you to place an object of type Risk on the canvas.
Click on this icon and then click on the spot on the canvas where you want to place the object. Double click on the placed object to set its properties. |
 |
Requirements: This tool allows you to place an object of type Requirements on the canvas.
Click on this icon and then click on the spot on the canvas where you want to place the object. Double click on the placed object to set its properties. |
 |
Document: this tool allows you to place an object of type Documents/Links on the canvas.
Click this icon and then click the spot on the canvas where you want to place the object. Double click on the placed object to set its properties. |
 |
Business units: This tool allows you to place an object of type Business units on the canvas.
Click on this icon and then click on the spot on the canvas where you want to place the object. Double click on the placed object to set its properties |
 |
Group: this tool allows you to place an object of type Group on the canvas.
Click on this icon and then click on the spot on the canvas where you want to place the object. Double click on the placed object to set its properties |
| Free forms and miscellaneous | |
 |
This tool allows you to place a diamond shape on the canvas.
Click on this icon and then click on the spot on the canvas where you want to place the object. Double click on the placed object to set its properties. |
 |
This tool allows you to place a square on the canvas.
Click this icon and then click the spot on the canvas where you want to place the object. Double-click the placed object to set its properties. |
 |
This tool allows you to place a circle on the canvas.
Click this icon and then click the spot on the canvas where you want to place the object. Double-click the placed object to set its properties. |
 |
With this tool, you can place a (background) image on the canvas. |
 |
With this tool you can draw a line. |
 |
With this tool, you can place loose text on the canvas.
Click on this icon and then click on the spot on the canvas where you want to place the text. Double click on the placed text to set its properties. |
 |
This tool allows you to place a swimlane diagram on the canvas. |
 |
This tool erases everything on the canvas. Note! This is not recoverable. |
 |
This tool allows you to adjust the size of the canvas. |
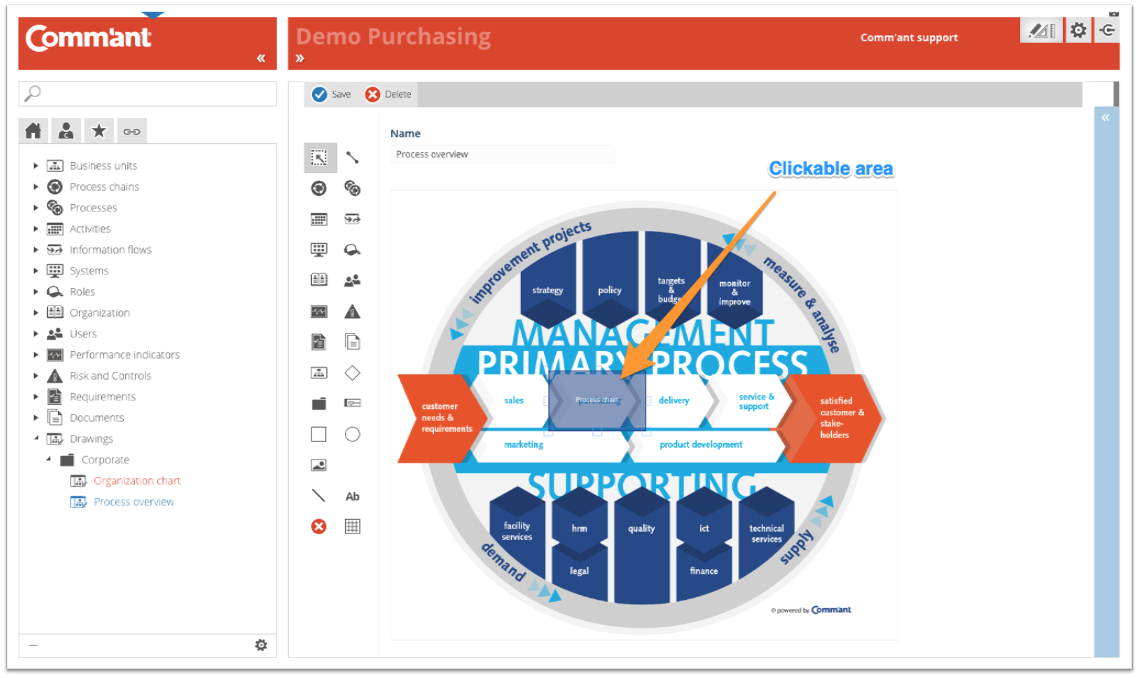
Drawing with background image
The example below shows a Drawing with an image in the background. The background image was created in Photoshop.
In this example, 1 click area has been added that refers to a Process chain. For the user, this click area is not visible, but it is clickable.
Drawing of an Organization chart
The example below shows a drawn Organizational chart by placing different object types and free forms on the canvas and connecting them using dynamic lines.
