
Capture Users
The various Users are added via the Navigation menu.
To create Users, make sure you are in Develop Mode via the switch ![]() in the Application bar (right behind your Username).
in the Application bar (right behind your Username).
Create a new User from the Navigation menu:
Step 1
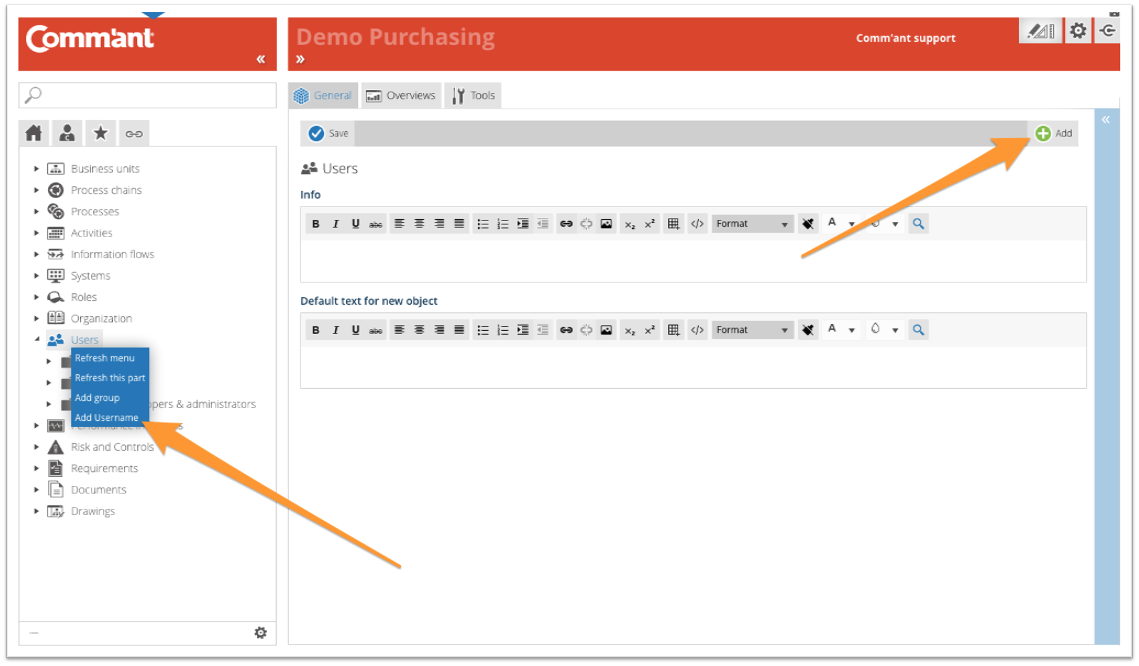
Select Users in the Navigation menu, right-click, and select “Add User” or click “Add” in the top right corner of the Main screen.
Create the User with at least his/her name and an email address. The email address must be unique, as the user logs in with this as well. The full name of the employee is entered in the field Name employee, this appears on the screen when the employee is logged in as User.
The system automatically generates a password. The password can be changed by the User.
Step 2
Add more information and save when you are done using the Save button at the top left:

- Fill in the Description Describe the content. If you want to go into details, decide whether these details should be clarified here or at a lower level. Extended descriptions can also be added as a document. You can refer to the document in the Description.
- With the Rights Profile option, you define what the User is allowed to do within Comm’ant (for details on rights profiles, see Profiles with Modification Rights).
- With Valid until you indicate when the content of the object must be reviewed. Comm’ant automatically assigns the current date plus one year to this field. This date can be changed if the period of validity ends on another date. Passing the date will not change the display. An overview of the objects whose date is about to expire or have expired can easily be created via a report.
- The Validated checkbox ensures that the newly created object is validated. If this box is not checked, the object will keep the encoding “Not validated” in the system. The advantage of this is that you can make an extra check on your recent additions in Comm’ant. You can generate an overview based on the status “Not validated” to show all changes and then go through them again, reviewing them for consistency and correctness before validating them. Validate the object by ticking the checkbox.
- The Revision field automatically shows the save date and time
Step 3
After saving, you also have the option to complete the Users object with connections to other objects: Organization / Job titles and Groups.
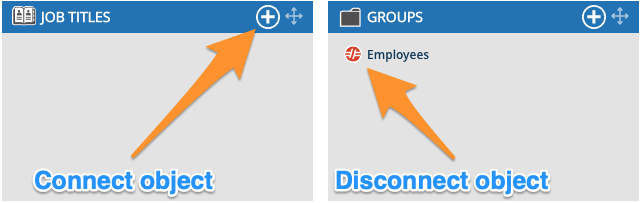
These can be existing or new objects. Existing objects are displayed in the connect boxes. You can create new objects right here via the plus sign at the top edge of the connect box. It is possible to disconnect existing links using the red unlink icon.
- You can connect the new User to one or more functions.
- When you connect a new User to a Group, it will be displayed in the Navigation menu in the folder of this Group, or you will find the User in the folder “Not classified”
Note: The changes in the text and date fields are saved via the Save button, other changes such as creating or deleting links are immediately updated; it is not necessary to save them explicitly.
To change a User:
To be able to modify a User, make sure you are working in Develop Mode via the switch in the Application Bar.
When you select a User in the Navigation menu with the left mouse button, you immediately have the possibility to change it.
You can save the changes via the “Save” button.
To delete a User:
When you delete a User, all links it has had to Input and Output and other objects will be deleted. The sub-objects, such as Groups and Organizations/ Job titles, remain in the system.
Users can be deleted by clicking on “Delete”. You will first receive a confirmation request before the User disappears. Deleting is irreversible.