
Groups
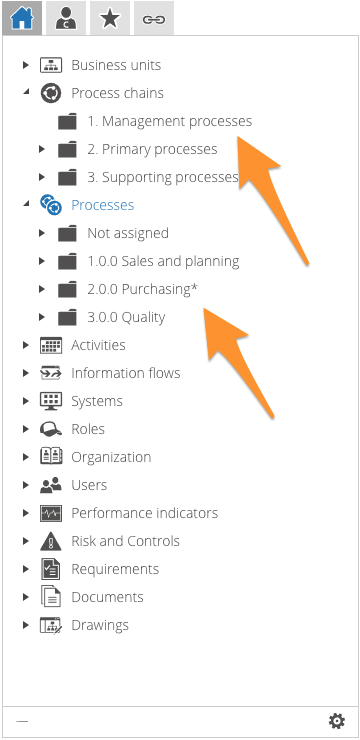
Because your Comm’ant system will soon contain a lot of information, we recommend that you organize the information in Groups. For example, you can place all processes around Purchasing in the Purchasing group under Processes. In this way, all activities related to Purchasing can in turn be placed in the Purchasing Group under Activities. This way you can keep the information organized in a clear manner. A Group is given the symbol of a file folder within the software. Each object type in Comm’ant can contain its own groups.
Groups have a few special properties within Comm’ant:
- A group belongs specifically to an object type
- Unlike other object types, the group name does not have to be unique
- An object can be placed in multiple groups
- If an object is not placed in a group, it will be placed in the automatically created group ‘Not classified’. If all objects of a certain type are classified in Groups, the group ‘Not classified’ will disappear automatically
- It is possible to create Subgroups within a Group
- Groups are sorted alphanumerically; to deviate from this it can be useful to number the groups.
- Because groups can significantly affect the structure, only the Application manager can delete groups
Defining the different Groups is done via the Navigation menu. To create Groups, make sure you are in Develop Mode via the switch in the Application bar (in Develop mode ![]() is visible behind your Username).
is visible behind your Username).
Creating Groups involves a number of steps:
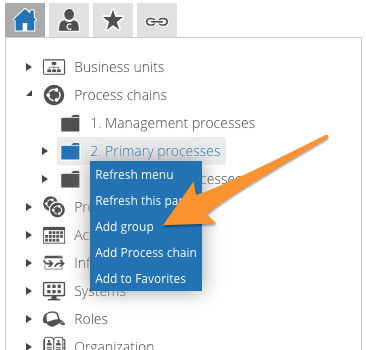
Step 1
Select the object type for which you are creating the group and right-click on it. Select “Add Group”.
Step 2
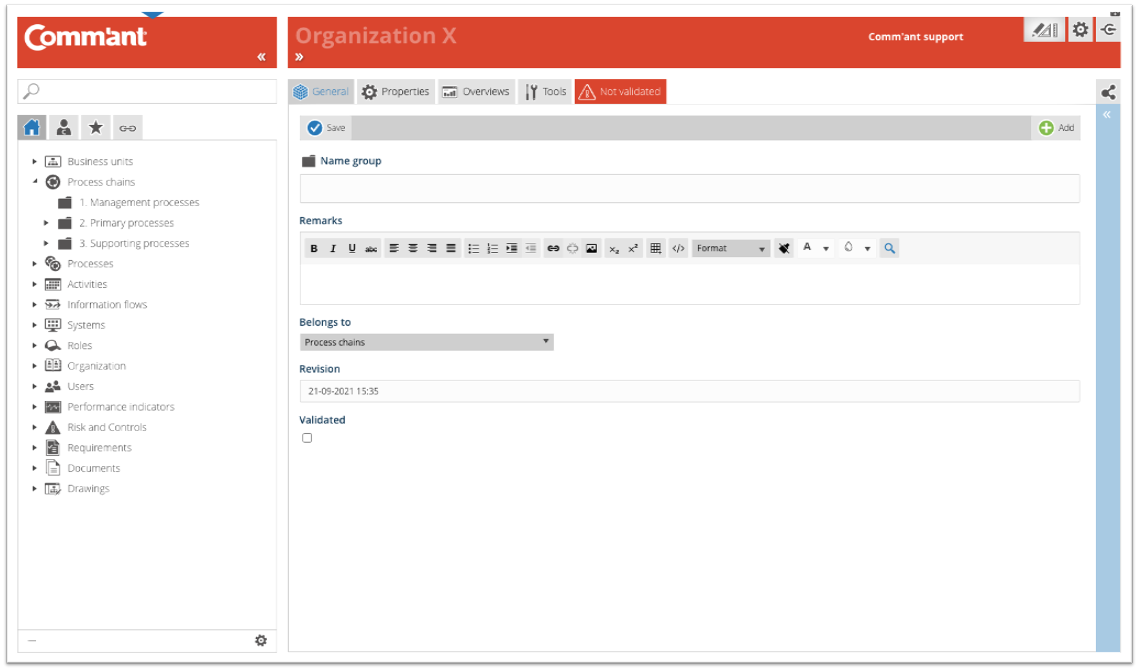
Create the Group with at least the name you enter in the Group Name field. The name can later be changed. Give the Group a clear and unique name.
Step 3
Add more information and save when you are done using the “Save” button at the top left:
- Add Remarks, especially during development and changes to the system. When you use special characters, such as @@ in combination with your initials and followed by a comment, you can easily find your comments with the search function, follow up and complete the work.
- The field Belongs to is automatically populated with the name of the object type you are creating the group for.
- The field Revision is automatically populated with the save date and time.
- The checkbox Validated ensures that the newly created object is validated. If this box is not checked, the object will stay marked as ‘Not validated’ in the system. The advantage of this is that you can make an extra check on your recent additions in the Comm’ant system. You can generate an overview based on the status ‘Not validated’ to show all changes and then go through them again, reviewing them for consistency and correctness before validating them. Validate the group by ticking the appropriate checkbox.
Step 4
After saving, you have the option to complete the Group with links to other objects: In Parent group(s), related Objects, and sub groups.
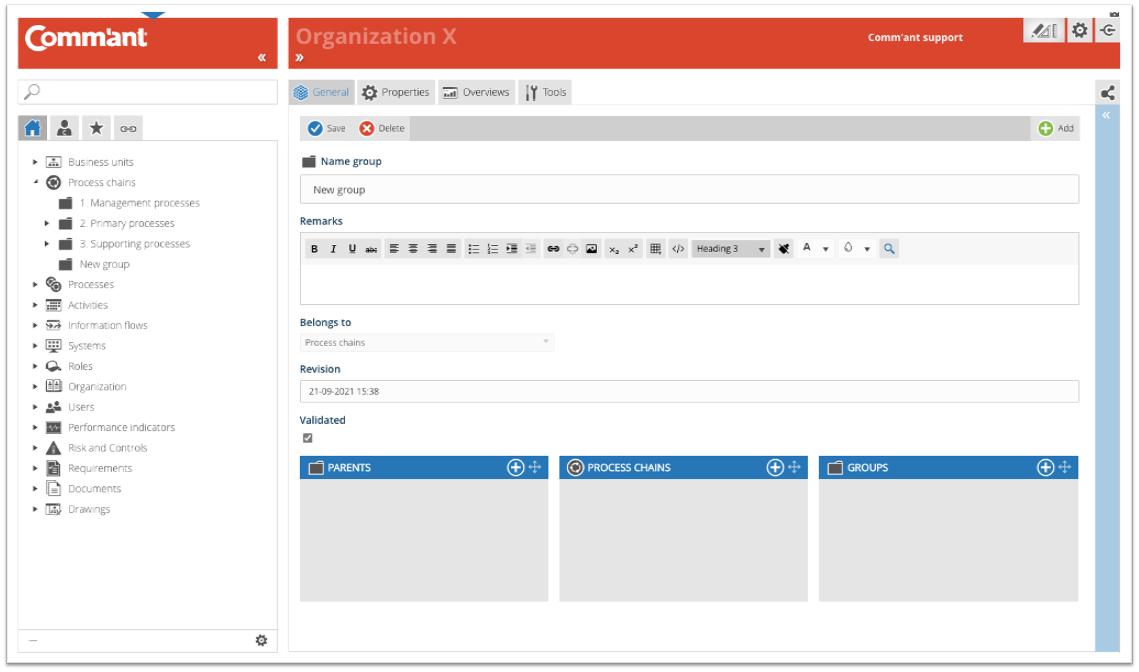
These can be existing or new objects. Existing objects are displayed in the connect boxes. You can create new objects right here via the plus sign at the top edge of the connect box. It is possible to disconnect existing links using the red unlink icon.
- When you connect the new Group to Parents, you add connections to existing or new Groups by selecting or creating them.
- When you connect the new Group to related Objects, you add connections to existing or new Groups by selecting or creating them.
- When you connect the new Group to Groups, you add connections to existing or new Groups by selecting or creating them.